Monday, January 16, 2012

French Macaron with Black Cherry Chocolate Glaze


I've always wondered how hard it is to make macarons... turns out it's not that bad. I'm not going to lie, it's a bit of a delicate process but not a lost cause for us novice bakers. I started my little project by googling macaron recipes and found that there are countless variations. I chose a French Macaron with a black cherry chocolate glaze. First things first, lets list the ingredients:


Cookie:


1 cup confectioners’ sugar, 4.5 oz
3/4 cup almond flour, 2.5 oz (I know you're thinking what the heck is almond flour... it's basically ground up blanched almond slivers. You can either throw the almonds in the food processor or do what I did because you don't have a food processor and pound them out with a mallet until you get a fine powder. It's a bit of a process).
2 large egg whites, room temperature 
Pinch of cream of tartar
1/4 cup sugar


Black Cherry Chocolate Glaze:


1/2 cup heavy cream, 4 oz
1 1/2 tablespoons unsalted butter at room temp.
6 oz semisweet chocolate chips
1/8 teaspoon cherry extract (I used McCormick's).


Take the confectioner's sugar and whisk it well with the almond flower, set aside. 


With an electric mixer, mix the egg whites on medium speed until you get a nice foamy consistency. It should take a good 5-8 minutes. Add the cream of tartar and continue to mix on medium for another 5 minutes. The mixture should start to get thicker. Slowly add the sugar and turn up the mixer to med-high. Mix for about 8 minutes or until you get stiff peaks. This is the part where you add the food coloring. I used a water based red and added 4 drops to get a nice pink color. I would recommend water based food coloring because it will mix easily. Once you add the drops, continue to mix for another minute or until you have an even color. Do not over mix your egg white mixture... stop once you get the stiff peaks by dipping a spoon and taking it out of the mixture. It should look like the top of a Hershey's Kiss. 


Take the almond flour mixture and slowly fold it into the egg white mixture. Fold it about 20-30 times or until it is evenly dispersed. Don't worry, it is normal for the egg white mixture to deflate slightly. 


Line two baking sheets with parchment paper and have a piping bag, or ziplock sandwich bag ready. Spoon your cookie mix into the piping bag and snip the bottom for an opening that is about a quarter of an inch wide. Pipe 3/4 to 1 inch rounds about an inch apart on the parchment paper and set aside at room temperature for about 30 minutes. Do not skip this process, it is crucial when striving to achieve that perfect macaron shape. 


While you're waiting for the cookies to set, pre-heat your oven to 325 degrees and get ready to make the glaze. 


In a saucepan, melt the butter and heavy cream together. Bring them to a boil and take them off the heat. Mix in the chocolate chips until you get a nice thick mixture. Add the cherry extract and mix well. Set the chocolate glaze aside and when it is time, pop the cookie mixes into the oven one baking sheet at a time. Bake for 8-10 minutes. Be careful not to brown the bottoms because the cookies will stick to the parchment paper. If you smell something that is similar to burnt popcorn, you've over-baked them. Take the baking sheet out repeat the process with the second sheet. 


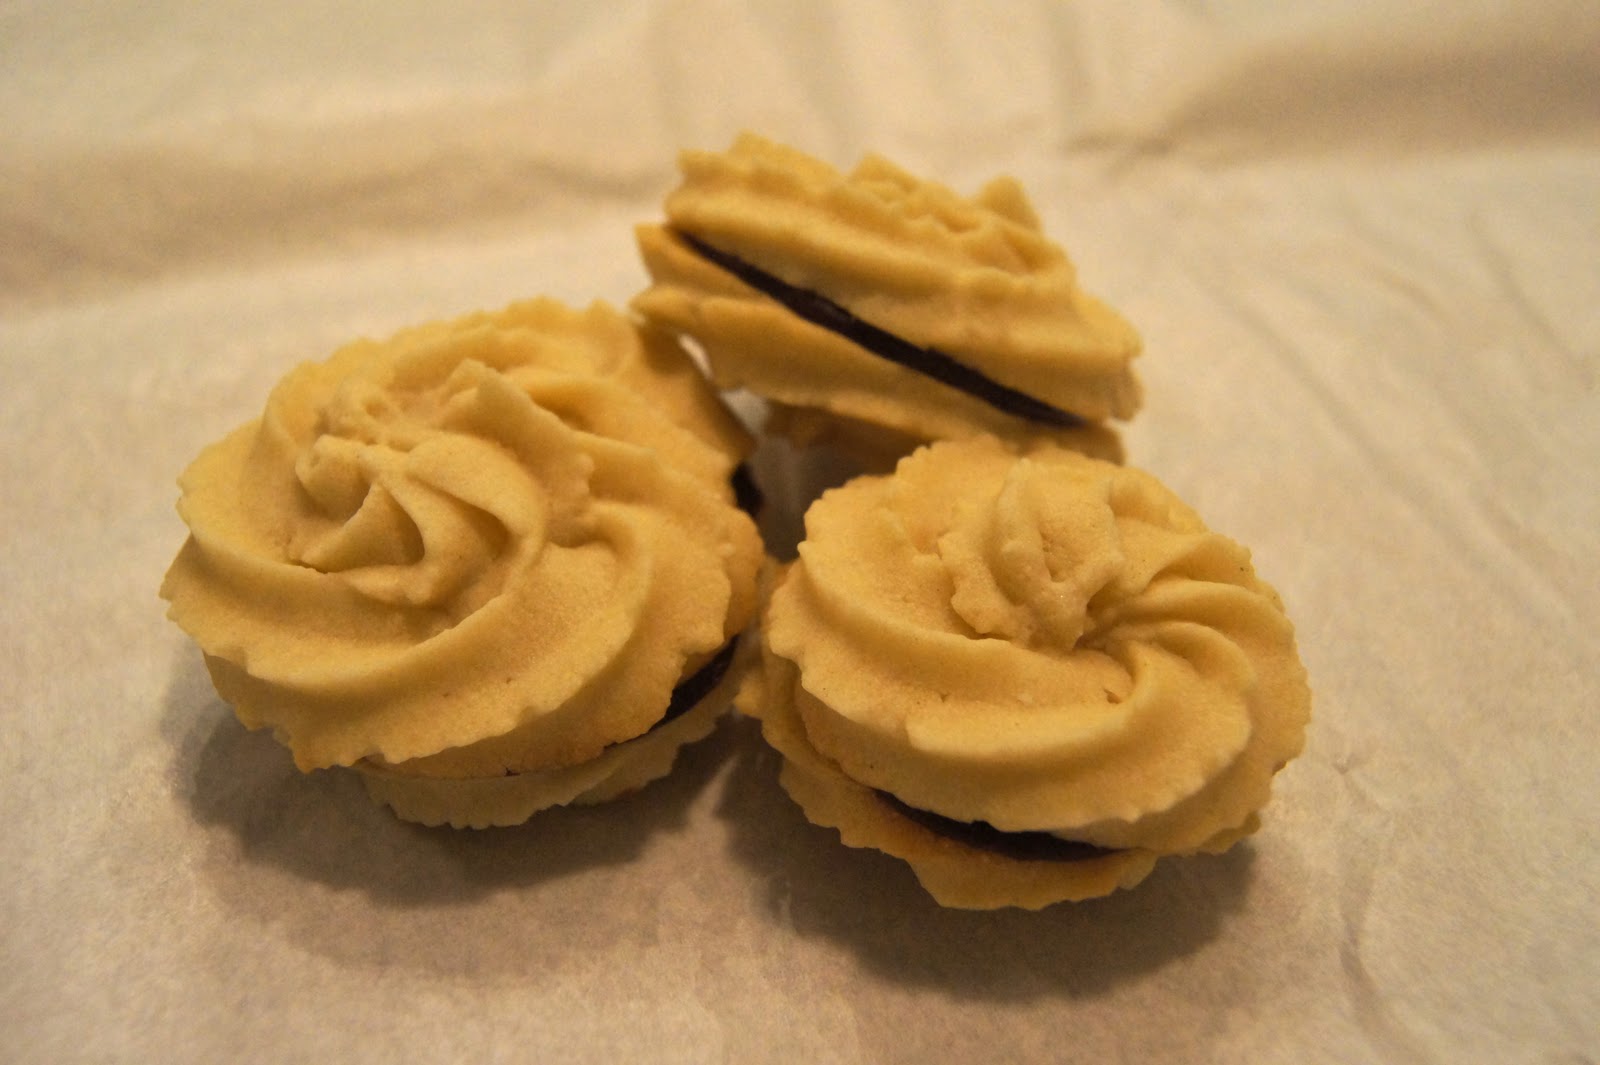
Let the cookies cool for about 20 minutes and carefully take them off the parchment paper. Fill another piping bag with the chocolate mixture and pipe the chocolate onto the bottom side of half the cookies. Let the chocolate sit on the cookies for 5 minutes before you take the other halves and make sandwiches. This will keep the chocolate from running because it starts to set. 


There you have it! Easy, fast and YUMMY... Enjoy! 

Tuesday, January 3, 2012

Iguana Cake Pops

My co-worker's daughter was celebrating her birthday at school today (Happy Birthday Maya!) and my co-worker needed something to take to school. Well, what kid doesn't like cake pops??? I decided to do the honors for the birthday girl but when she decided she wanted cake pops in the shape of iguanas I'll admit I was a bit apprehensive... This is what I came up with.
After several requests, I've decided to share the secret cake pop recipe... DON'T laugh at how easy it is. I've realized that making cake pops are not difficult, the process is just really time consuming and takes a little creativity.

Here's what you need...
1 box of cake mix (flavor of choice)
1 can of frosting (flavor of choice... my two favorites are cream cheese and chocolate)
A couple baking sheets or trays that will fit in the fridge and parchment paper.
Some candy sticks that you can get from Michael's or any cake decorating store.
Your choice of candy coating, again, something that can be found at Michael's.
A really creative way to get the cake pops to stand straight up in the refrigerator ( I use styrofoam wrapped in plastic).

Steps...

1. Bake the cake according to the instructions on the box. I use a 13 X 9 pan and make one cake because there's less clean up with one pan. Let the cake cool for 30-45 minutes or until it is completely cooled.

2. Crumple up the cake and place it into a large bowl.

3. Take half a standard can of frosting and mix it into the cake. You will need to use your hand and mush the mixture together until the frosting is evenly incorporated.

4. Take a standard tablespoon or small ice-cream scooper and scoop out some cake and roll it around into the shape of a ball. I would recommend no bigger than an overflowing tablespoon because the pops become harder to dip the bigger they get. I've had many cake pops go into the dipping coating and never come out :(

5. Once you've rolled up the perfect ball, place it onto parchment paper. Continue until you've rolled up the entire mixture. One boxed cake should make about 30-35 pops.

6. Place the balls into the refrigerator for about an hour.

7. Melt some chocolate or candy coating in the microwave and have your dipping sticks and balls ready. Take the stick, dip it about a quarter inch into the coating and push it into the cake ball making sure you don't go too far into the ball. You want to get about halfway into the ball. Repeat this process and stick them straight into the styrofoam. Pop them back in the refrigerator for another 30 minutes or until the coating has dried.

8. Melt your desired coating in the microwave about 30 seconds at a time until nice and smooth. Dip the pops into the coating making sure all the excess is off and stand them back up on the stand. Once dipped, place them back in the refrigerator to dry the coating.

9. Design as desired and ENJOY :)


Vanilla Spritz Sandwiches

My husband LOVES those Milano Cookies from Pepperidge Farms... naturally, who doesn't? When I came across a cookie recipe book at William Sonoma that offered a similar style cookie recipe I thought... SCORE... I can make those. Don't fret, I know you're thinking William Sonoma is pricey but I'm going to share the recipe with you. These are called Vanilla Spritz Sandwiches and they are just as good, if not better than the Milano Cookie (not to mention I happen to think they're cuter).
In a bowl, whisk together 2 1/4 cups of flour and half a teaspoon of salt.

In another bowl mix two sticks of butter and 1 cup confectioner's (powdered) sugar together. If you're using an electric mixer, use medium speed until the mixture becomes fluffy (about 2-3 mins).

Add 1 large egg and 1 teaspoon of vanilla extract and continue to mix until the egg becomes fully incorporated into the mixture.

Reduce the mixer to low (if you don't want a face full of flour) and SLOWLY add the flour-salt mixture.

When you're done, place the dough in a piping bag with the desired tip ( I used a plastic Wilton disposable bag with a star tip but you can use different tips for specific shapes).

The dough is going to take some firm pressure to come out of the tip so don't worry if your first couple of tries don't look perfect. Use parchment paper on dark non-stick baking pans and make 1-1 1/2 inch rosettes. You don't have to space them too far apart because the dough won't expand too much in the oven.

Place the baking sheets with the rosettes in the refrigerator for 15-20 minutes.

Heat the oven to 325 degrees F and bake for 12-15 minutes, depending on the size. Watch these carefully while they bake because you don't want the edges to brown too much. 12 minutes were enough for mine.

Take them out and let them cool while you make your chocolate glaze...

For the glaze you will need 6 oz of semi-sweet chocolate ( I used Ghirardelli baking chips), 1/2 cup of heavy cream, 1 1/2 tablespoons butter, and a pinch of salt

Heat the cream and butter in a saucepan on MED heat and bring the mixture to a boil.

Remove it from the heat and add the chocolate and salt. Mix the chips until the mixture is smooth. You don't need to put the mixture back on the heat. Let the mixture cool for 30 minutes.

Take the cookies and match the undersides up so you have two cookies that are close enough in size. Put your glaze in a piping bag without a tip. Snip the tip of the bag and pipe the glaze on one cookie bottom, take the matching cookie and press down making a sandwich.

The recipe made about 20 sandwiches, with a few casualties here and there.

Cool them in the refrigerator for an hour or until the glaze is firm and ENJOY!