Wednesday, December 19, 2012

Easy English Toffee


English Toffee, one of those treats that seems so difficult to make yet tastes so good it makes you want to try. Well, I tried tonight and I can report that it is not the easiest thing I've attempted to bake yet not as difficult as it seems.

Here's the simple recipe...

You will need:

1 cup of butter (two sticks)
1 cup of sugar
2 Tbsp of cold water
1 tsp of vanilla extract
6 oz of semisweet chocolate (I use chocolate chips)
1 cup of nuts (I prefer walnuts but almonds seem to work too)

Foil
13 X 9 Pan

Take aluminum foil and cover your baking pan, making sure you press down on the corners. Place the pan aside. Take the nuts and cut them up into small pieces, place aside.
Place the butter, sugar and water in a medium sized pot and heat the mixture on MEDIUM heat, stirring immediately and constantly. This is very important! Do not let the mixture ever sit, keep stirring it! After about 10 minutes, the mixture should develop a marshmallow type consistency then start to turn brown. Do not worry if it does not turn brown right away, and DO NOT change the heat setting. Leave the heat at a steady medium and keep stirring. It will eventually start to brown. Once you achieve the desired caramel color, take the mixture off the heat and add the vanilla.
Stir the mixture off of the heat for about one minute and pour it into the pan.
Let the toffee sit for about 3-5 minutes to cool. Do not let it cool completely! Sprinkle the chocolate on top of the toffee evenly covering the pan. Let it sit for about 5 minutes, allowing the chocolate to melt.
Slowly spread the chocolate to cover the entire toffee bottom evenly. Sprinkle the nuts atop the chocolate and place the pan in the refrigerator for about an hour to allow everything to set.
Take the pan out and left the foil out of the pan. The toffee should separate easily from the foil.
Either break or cut the toffee into pieces and ENJOY!!!


This is a very simple and inexpensive holiday gift. Here are some packaging options...


Happy Holidays!!!


Tuesday, December 18, 2012

Ruloph the Red Nosed Reindeer Cake Pops

It's the holiday season and I'm feeling festive! I made these pops for my co-workers and they were a hit! I'm not going to post the ingredients because I've already explained how I make the pops in previous posts. I'm simply posting these little guys to give you any last-minute ideas you may need.


I've seen many variations of this but I decided on chocolate cake, cream cheese frosting and chocolate coating. For the nose I went with red M&Ms which I personally picked out of the bag! The eyes are a combination of white sugar confetti and black cookie icing.

The most time consuming part... the antlers! I had to break pretzels into shapes that resembled antlers. I'll say this... it's pretty difficult to make the antlers look similar.


When all is said and done, they came out pretty well. Some people told me they were almost too cute to eat!

Hope you got some good ideas!

Happy Holidays!!!

Sunday, November 11, 2012

Pumpkin Spice Cake Pops


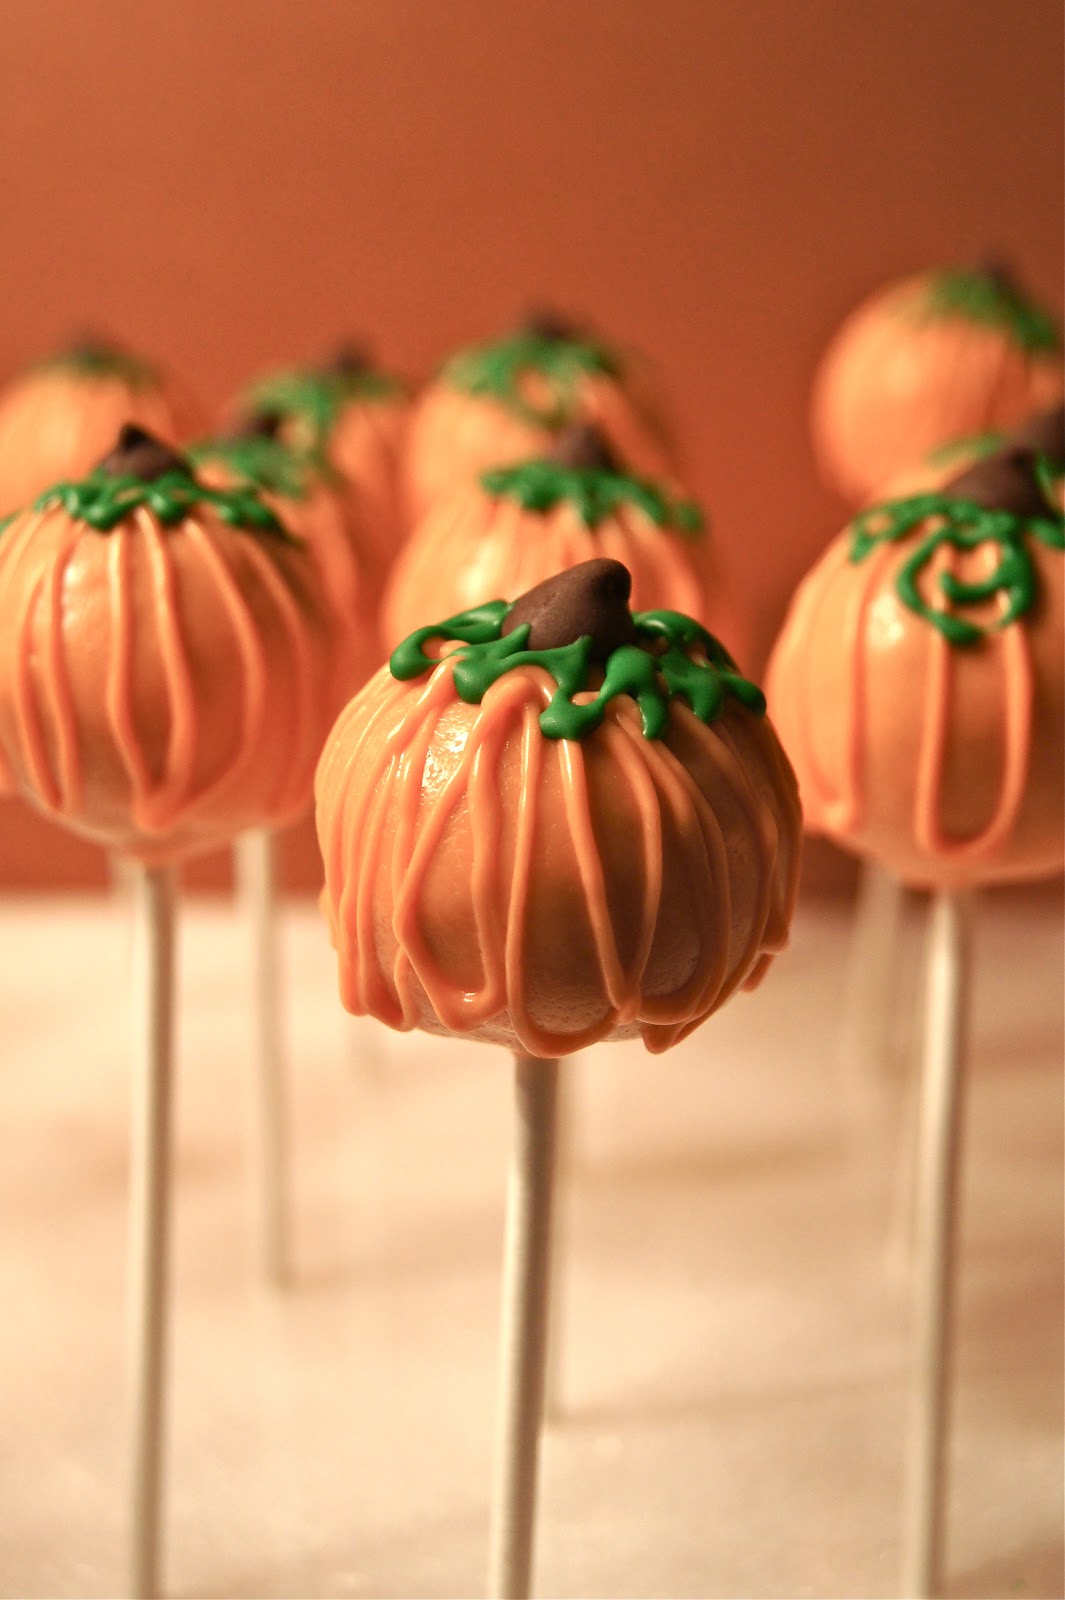
I was asked to make "fall-themed" cake pops recently so I decided to make pumpkin shaped pops for two reasons. One, I figured pumpkins would be easy to make. Two, I knew I wanted to go with a pumpkin spice flavor for the pops. I underestimated how difficult the piping would be for the pumpkins but I made it work in the end.

Here's everything I used:

Cake:

1 box of spice cake mix ( I like Duncan Hines), you will need a 13X9 cake pan, vegetable oil and eggs
1 can of pumpkin puree.
1 can of creamy cream cheese frosting

Pops:

2 bags of Wilton candy coating in orange
30-40 cake pops sticks
Green cookie icing (Wilton's makes one that comes in a jar)
1 bag of chocolate chips (I use semi-sweet chips in the regular size)
2 piping bags
Icing tips (No. 1 or No. 2 size, found at Michael's)
Cornstarch
Vegetable shortening
Cookie scooper
Cake pop stand (a block of styrofoam works best)

Process: READ THE WHOLE THING BEFORE YOU RUN THROUGH IT.

Making the cake:

Preheat the oven to 350 degrees.

Mix all the ingredients for the cake mix first and then slowly mix in about 1 cup of pumpkin puree. You can eyeball the amount of pumpkin puree and add it as desired. I do not care for too much pumpkin flavor so I stuck with about a cup.

Pour the cake mix into the pan and bake for 35 minutes or until golden brown around the edges.

Remove the cake from the oven and let it cool for about 30 minutes.

Crumble the cake into a large bowl. I don't like to use the edges of the cake because they are crunchy but you can use them if you don't mind. If you have a food processor you can use it to grind up the cake but I just crumble it by hand until it is completely crumbled.

Mix in about half a can of frosting. You will have to use your hands to mix it in. There is no way around it, it will not mix as well with a spoon or any other utensil, trust me.

Take a cookie scooper a scoop out a small portion. Roll it around in your hands until you have a ball and place it on a cookie sheet. You don't have to use parchment paper if you don't have any handy, it will not stick to the cookie sheet. You should be able to make 30-40 balls. Place them in the freezer for about 20 minutes so they firm up.

Making the pops:

Get the sticks ready. Take a small amount of chocolate chips (about half a cup) and melt them. Place the tip of the stick about half an inch into the chocolate and immediately push it halfway into a cake ball. Be careful to push only halfway into the cake. Push too far and the stick will come through the top of the cake pop. Don't push it in enough and you will lose the cake pop into the candy coating when you try to coat it. Repeat the process until all the cake pops are on sticks on your stand.

Melt the orange candy coating in a styrofoam cup with the microwave. I do not like to use glass because it gets very hot and can burn the coating. Microwave for 1 minute, stir and put it back in the microwave 30 seconds at a time after that until melted. I use about a teaspoon of vegetable shortening to make my coating smoother. Do not over use the shortening because it will make your coating oily runny.

Dip the pop into the coating and shake off excess. Place the pop on the stand and immediately place a chocolate chip on the top before the coating dries. Repeat the process until all the pops are coated a standing up on the stands with the chocolate chip stems on top. This will be the longest part of the process so have patience!

Take the remainder of your orange coating and mix in a teaspoon of cornstarch to thicken the mixture. Place it into a piping bag fitted with your desired tip and pipe the lines up and down the sides of the pumpkin in one motion.

Mix the green cookie icing with a teaspoon of cornstarch and place it into a piping bag with the desired tip. Pipe the leaves onto the pumpkin as desired.

Place the batch into the refrigerator for about an hour to ensure the icing has dried completely if you are going to cover them.

ENJOY!!


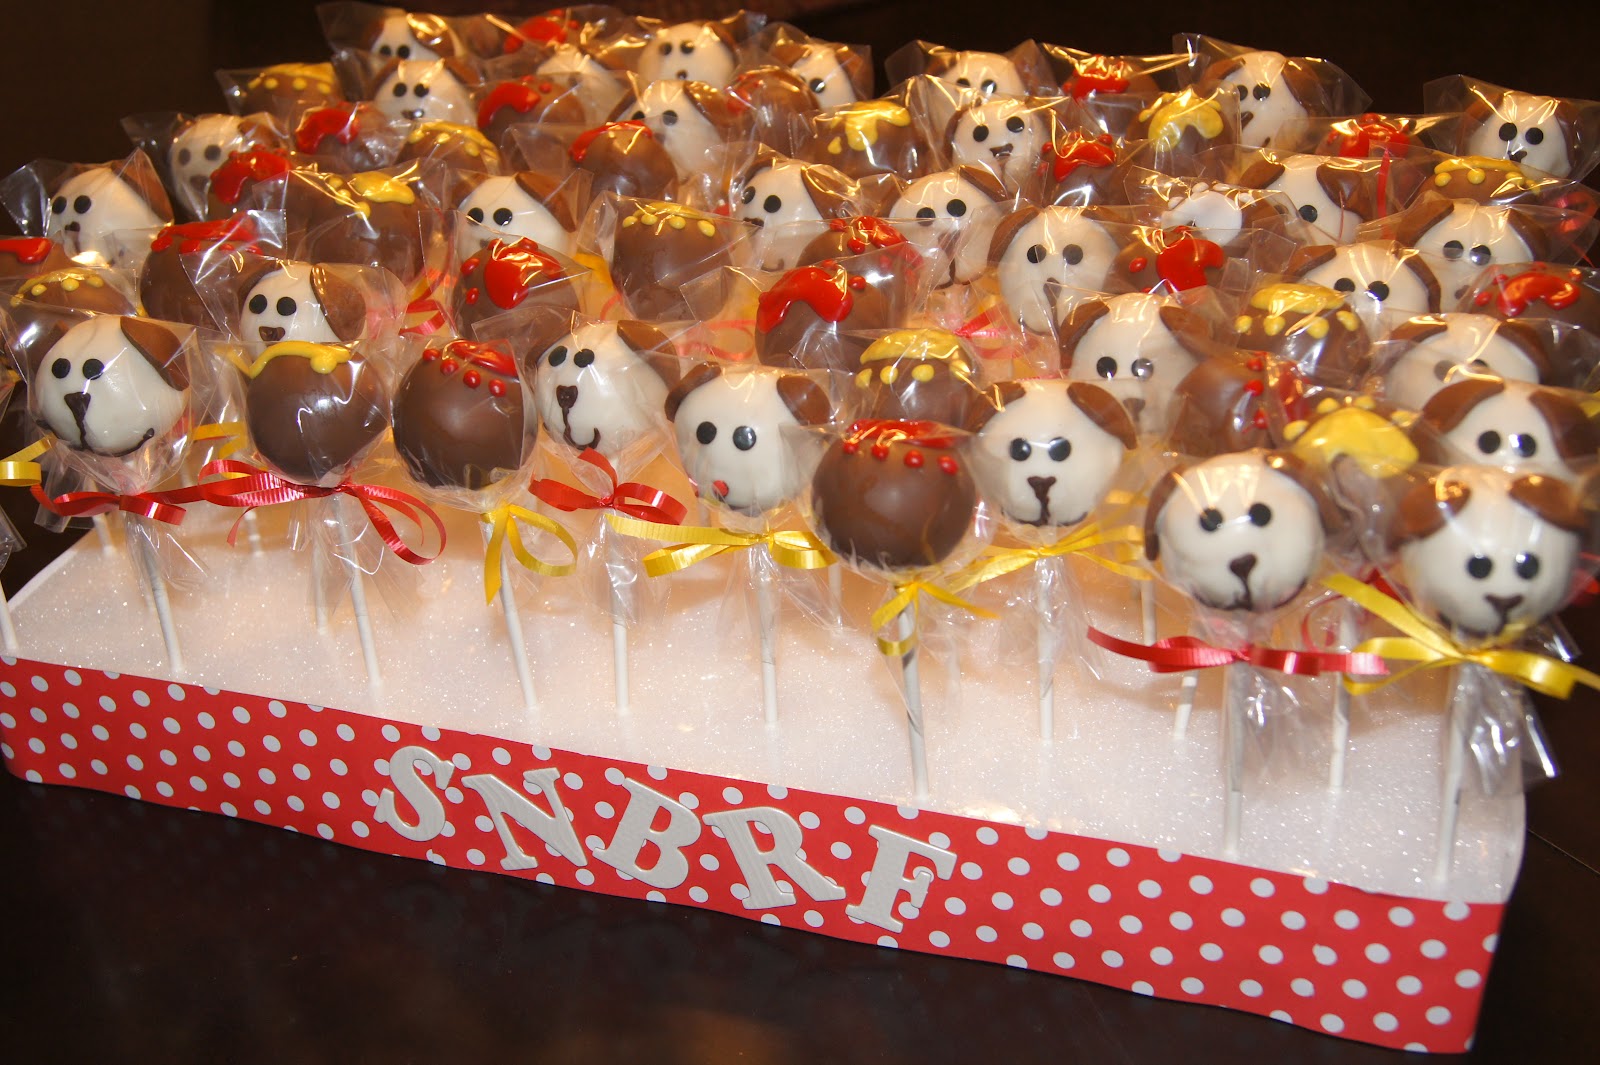
Just a packaging option for you. Very fall-like I hope :)

Saturday, April 28, 2012

Boston Terrier Cake Pops


It's been awhile since I updated this blog... my apologies. To tell the truth, I haven't made cake pops in a long time so there was nothing to update. No fear, though, I'm back at it and I even learned some new stuff I'm willing to share.

My co-worker asked me to make cake pops for his daughter's birthday and we decided on on Boston Terriers with an Oreo Cookie cake. I threw some ideas around in my head and finally came to the realization that I would HAVE to work with fondant if the pops were going to resemble a dog. I've used store-bought fondant before and absolutely hated it so, after some research, I decided to make marshmallow fondant. It was actually much easier than I anticipated but VERY messy. Here's the process from beginning to end...

INGREDIENTS FOR THE CAKE:

1 box of vanilla/yellow cake mix (The preparation calls for eggs, vegetable oil and water so make sure you have all the ingredients listed on the box)
1/3 box of Oreo Cookies
1/2 can of prepared buttercream or vanilla frosting. I used buttercream because I prefer the taste. 

INGREDIENTS FOR THE COATING:

1 bag of Wilton white candy coating OR 1 bag of white chocolate chips (I used white chocolate)
1 bag of Wilton milk chocolate candy coating OR 1 bag of milk chocolate chips (tastes the same in my opinion)
Vegetable Shortening
Black food coloring (you will need this for the fondant too... remember, with black, a little goes a long way)

INGREDIENTS FOR THE FONDANT:

1/2 bag of marshmallows (8 oz)
1 pound of powdered/confectioner's sugar and extra for dusting
2 tablespoons of water

ADDITIONAL SUPPLIES NEEDED:

1 microwave safe bowl
13X9 baking pan
Parchment paper
Cookie scooper (not a necessity but it will make this project much easier)
Cake pop sticks (I get mine from Michael's)
Styrofoam or makeshift stand for your pops
Plastic wrap
Rubber gloves (food safe)

PREPARATION:

  • Preheat your oven according to the directions on the cake mix box
  • Mix your cake ingredients and pour the mixture into a 13X9 pan, pop into the oven as directed
  • While your cake is baking, take 1/3 box of Oreos and scoop the filling out of the cookies. Discard the filling and crush the cookies. 
  • After your cake is done baking, let it cool for about 20 minutes
  • Take a large bowl and crumble your cake into it. Add the cookie crumbles and about 1/2 can of frosting.
  • You will need to use your hands to mix everything together evenly. 
  • Put the mixture into the fridge for about 20 minutes so it stiffens up a little. 
  • Prepare a couple of trays with parchment paper
  • Scoop the mixture with a medium sized cookie scooper and roll it into a perfect ball with your hands. Place the ball onto the parchment paper and repeat. The mixture should make about 30 balls. If you have a lot less, your pops will be too big. Beware of making them too large as they WILL fall off the stick. 
  • Pop the rolled balls into the fridge for about an hour. 
  • Get your sticks and pop stand ready. 
  • Microwave a small portion of your candy coating or chocolate (you won't need more than a couple of tablespoons)
  • Dip the top of the stick about 1/4 inch into the melted chocolate, slowly push the dipped end into the cake ball about halfway through. Be careful not to push too far as you will tear through the whole ball.
  • Stand the pop onto your stand and repeat
  • Put the pops back into the fridge for about 20-30 minutes
  • Take about half of the white coating/white chocolate and microwave in a cup until smooth. Add about a teaspoon of vegetable shortening after you heat the coating and mix well until the entire mixture is smooth.
  • Dip the cake into the mixture and roll off any extra coating. Return the pop back onto the stand. 
  • After all of the cake pops have been covered, place them back into the fridge while you melt the darker coating. 
  • Take your milk chocolate and melt it in the microwave as you did the white chocolate. Add a few drops of the black food coloring and mix. You will notice the mixture start to harden. Add vegetable shortening 1/2 a teaspoon at a time. You don't have to re-heat, just mix well and the mixture will soften again. Do not add too much shortening as this will make your mixture oily and it will not firm up properly when dry. 
  • After you've reached the desired consistency, dip the pop into the mixture sideways on both sides making sure the dark chocolate does not touch in the middle. 
  • Place the pops back in the fridge while you work on the fondant. 
  • For the fondant, take half a bag of marshmallows (about 8oz) and drizzle 2 tablespoons of water on top before you place into the microwave. Make sure you use a big bowl as the marshmallow will rise. 
  • Microwave for about a minute. Do not let the marshmallow brown on top so watch it in the microwave!
  • Slowly mix in the powdered sugar with a spatula, about one cup at a time. After about 4 cups, you will notice the mixture start to stick together. Don't worry if it is lumpy, that's normal. 
  • Sprinkle a smooth surface with powdered sugar as well as your hands. 
  • Take the mixture out and knead it with your hands until it is smooth and no longer sticky. This part if very messy and takes a while. Don't worry, it will eventually do what you want it to.
  • Separate your fondant into halves and wrap one half with plastic wrap.  
  • Take the other half of the fondant and shape it into a bowl. You might want to use gloves for this next part. 
  • Take a few drops of black food coloring and drop it into the middle of the bowl. Knead the fondant until the color is evenly distributed. Don't worry, this part is not as hard as you think, the color distributes pretty easily. 
  • Once you have your two fondant colors, you can begin to shape the face the way you want. I will not describe this part because you can use several variations. I will remind you to use powdered sugar every time you handle the fondant because it will stick to your hands. 
Enjoy making these fun cake pops!!!


Monday, February 20, 2012

Cheesecake Chocolate Chip Cookie Cups

I found this recipe in a Nestle Holiday Recipes book that I picked up at a grocery store years ago. I've tweaked the recipe over the years and turned it into my most popular bake to date. It's pretty easy to make and I'm yet to find a single person who doesn't like it. Here it is...

What you'll need:

1 package of Nestle Toll House Refrigerated Chocolate Chip Cookie Bar Dough (breaks off into 24 squares)
2 packages (8oz each) of cream cheese at room temperature
1 can (14oz) of sweetened condensed milk
2 large eggs at room temperature
1 teaspoon of vanilla extract
1 can (about 21oz) of pie filling. I use cherry but you can use strawberry, blueberry or apple
24 cupcake liners and muffin pan

Start by preheating your oven to 325 degrees F.
Line 24 muffins/cupcake cups with paper cupcake liners
Take the cookie dough bar and use a chef's knife to cut the dough into squares (the dough should be pre-cut and you can break the squares off by hand but I prefer to cut them and get a cleaner cut... I'm picky that way)
Press each square into the bottom of each paper cup and pop into the oven for no more than 8 minutes
While the cookie bottoms bake, take the cream cheese, condensed milk, eggs and vanilla and mix them in a bowl until smooth.
Take the cookie cups out of the oven and immediately pour about 3-4 tablespoons of the cheesecake mixture onto the cookies. Take care not to fill the liner to the top because the cheesecake will rise.
Place back into the oven and continue to bake for 22-24 minutes.
Take out of the oven, let cool and spoon your choice of pie filling on top.
Refrigerate the cups for at least a couple of hours and...

ENJOY

Sunday, February 12, 2012

Puppy Cake Pops

I made these pops for the Southern Nevada Beagle Rescue Foundation the other day. It was my first experience with fondant. I must admit, I cheated and did NOT make the fondant from scratch. I simply bought chocolate fondant from Michael's (I should own stock in that place) and rolled it straight out of the box. All I needed was some confectioner's sugar to keep the stuff from sticking to every surface in my kitchen. I rolled it really thin and used small leaf cut outs, also purchased from Michael's. One bit of advise for anyone reading this who has not worked with fondant before... work fast cause it dries up at a remarkable rate. Once the leaves were cut out, I used icing to stick them to the pops. The eyes are black confetti icing and the rest of the face is dark chocolate that I piped on.

I included chocolate pops with paw prints on the top just to mix it up but rumor has it that the puppy pops were much more popular.

Monday, February 6, 2012

Tinkerbell themed party cake pops

My cousin's little girl had a Tinkerbell themed party this last weekend for her 5th birthday and I decided to make some treats for the kids. I kept it simple with pastel colored pops with flower shaped icing.
I arranged the pops in a stand I made out of two sheets of round styrofoam that can be purchased at Michael's. I glued the two sheets together to make the stand thick enough to hold up the pops. Then I glued yellow construction paper around the edge and wrapped it up with a ribbon. It's easy and cheaper than buying a stand.

Finished Product. Happy Birthday Brianna!